Add a Table of Contents With Images to Collection Pages in Webflow


Having a table of contents on blog posts and articles drastically amplifies user experience.
It allows users to see a glimpse of what they're getting themselves into, and it lets them skip sections they may not want to read.
This gets a bit tricky when dealing with Webflow Collections pages (or any template page) because we don't necessary want to add a table of contents to all of our blog posts.
I've tried and tested lots of different ways to go about this, and the best way I've found is to create an embed code and link images to anchor links on the page.
In this tutorial, you will learn how to link to page sections in Webflow. Two options:
Create Table of Contents With Images
Step 1: Create Anchor Links
First, we need to create the anchor links. Anchor links are the points on the page we want the images in the table of contents to bring us to when we click them.
To add an anchor link, find the place on the page you want the link to bring you to when you click it.
Add an embed code directly above that section's text.
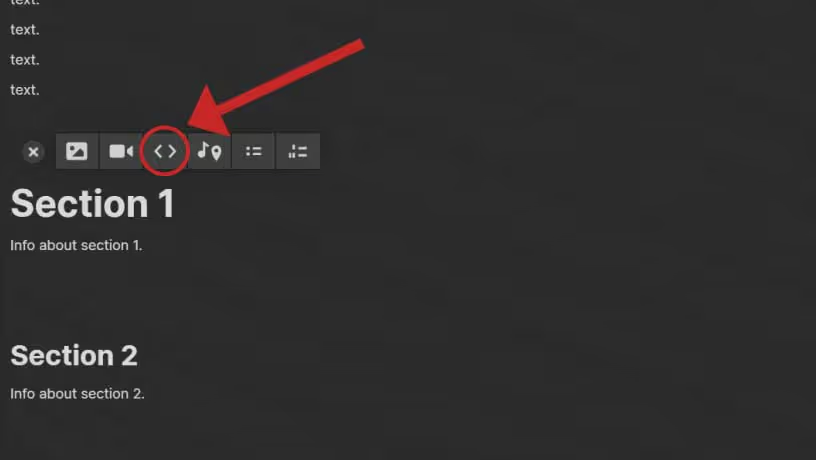
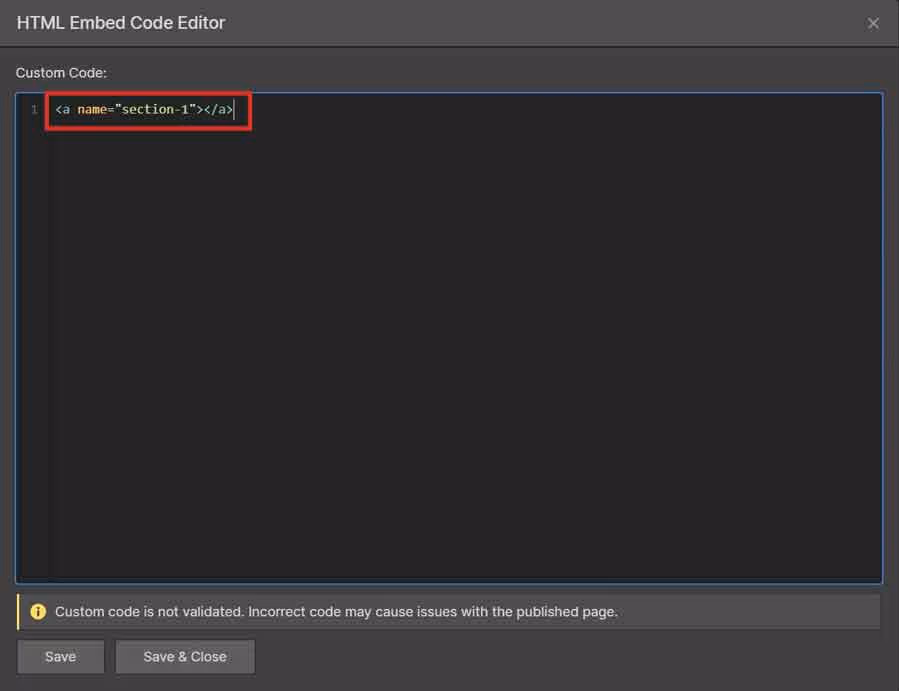
Copy the code below, and paste it into the HTML embed code editor, and label the section whatever you want.
See the Pen gObdEOL by Digital Red Panther (@digitalredpanther) on CodePen.
Repeat this for all of the sections on the page you want to link to from the table of contents.
To link to that section, we would add the URL of the current page and add "#section-1" to it.
So for for example, this would look like "https://example.com/example-post#section-1".
We will add that later.
Step 2: Add the Table of Contents Embed Code
To add the table of contents itself, find the place on the page you want to add it, and add an embed code.
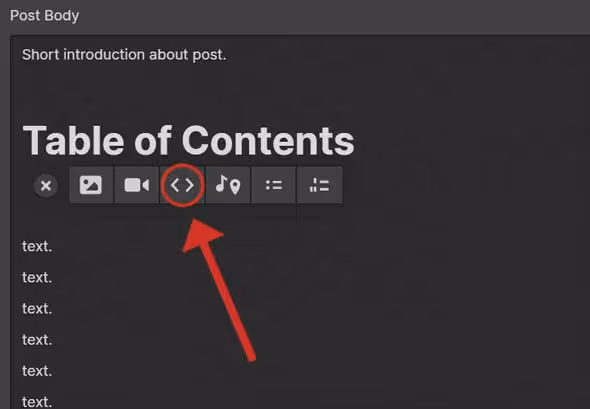
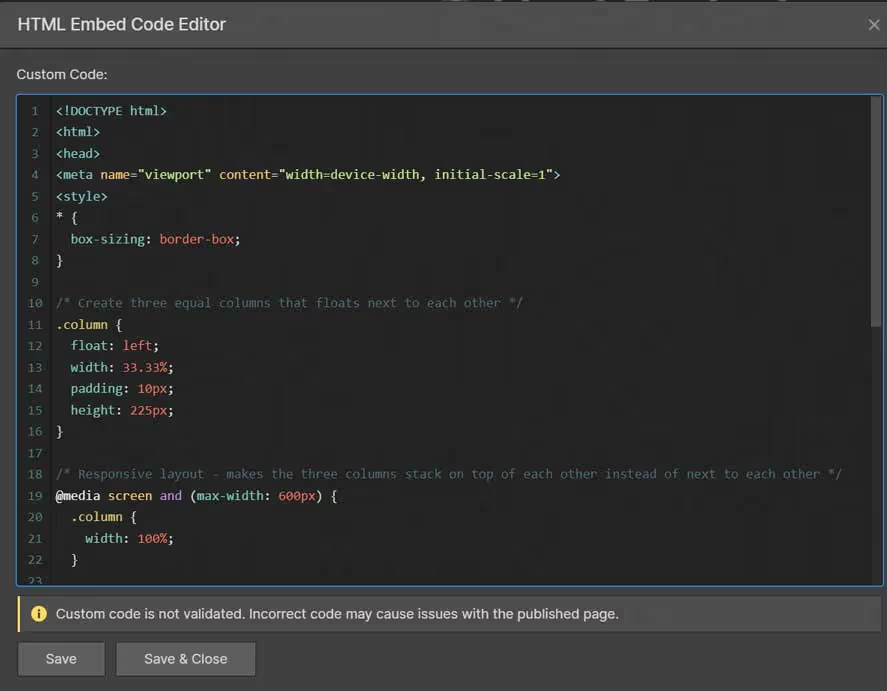
Copy and paste the code below into the HTML embed code editor.
See the Pen TOC Column Template by Digital Red Panther (@digitalredpanther) on CodePen.
Step 3: Customize the Code
This code gives us a basic 3-column template. We can now customize the images and the text how we please.
While we can really edit any of the code we'd like, here is the bare minimum you need to adjust in each column:
- Anchor links to sections
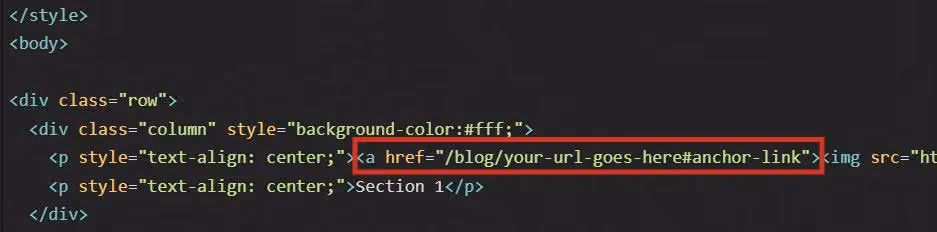
In the case of this example, since we named the anchor link earlier <a name="add-your-section-name-here"></a>, and the URL slug of our blog post is new-blog-post, our anchor link URL would be: "/blog/new-blog-post#section-1".
- Image URL's
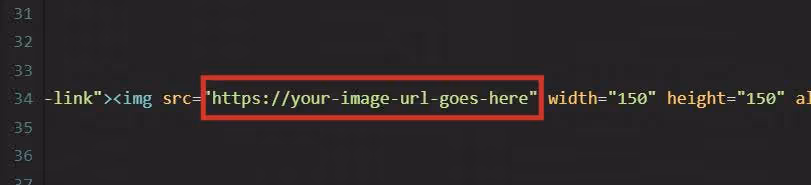
To add an image URL, simply upload an image to Webflow, click the gear icon next to the image, and then copy and paste the image URL into the appropriate space in the embed code.
- Alternative text
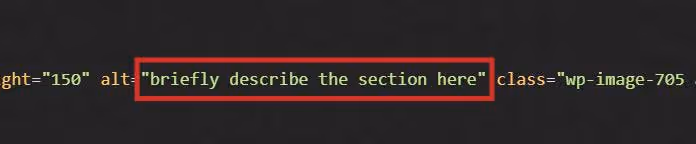
The alternative text is not seen on the page itself, but it is seen by search engines. Simply describe the section users are clicking to in a few words.
- Section Name
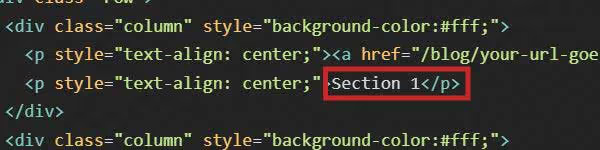
Give the section an appropriate name. This will be seen by users.
Create Table of Contents Without Images
This is a much simpler process, and it involves using the anchor links similar to how we used them for the above example.
Step 1: Create Anchor Links
So to do this, start by adding anchor links to the sections you want to jump to.
Add an embed code element, and paste this as the anchor link.
See the Pen gObdEOL by Digital Red Panther (@digitalredpanther) on CodePen.
Add a section name and some text if you want. An example would be:
- <a name="section-3">This is the start of Section 3.</a>
Step 2: Create the Table of Contents
Next, list out your sections somewhere near the top of your blog post, like so:
- Section 1
- Section 2
- Section 3
- Section 4
- Section 5
Double click each section individually and add a link to each one of them. Point the URL to the corresponding anchor link by using the URL of the current blog post and adding "#anchor-link" to it.
So if this was my anchor link that I used for section 1:
- <a name="section-3">This is the start of Section 3.</a>
This would be the URL I would hyperlink to jump to Section 3:
- "/blog/post-slug-url#section-3"
That's it!
As always, if you have any questions or if you have an idea for how I could make this easier to understand, please comment below. I do read them. All of them.